In the evolving landscape of industrial automation and the Internet of Things (IoT), the integration of legacy RS232 devices into modern Ethernet networks has become a critical aspect. To achieve this integration, RS232 to Ethernet Converters play a pivotal role, bridging the gap between these two technologies. This article aims to provide a comprehensive guide to configuring an RS232 to Ethernet Converter to automatically acquire an IP address using DHCP (Dynamic Host Configuration Protocol).
RS232 is a serial communication protocol that has been widely used in industrial applications for decades. It is a point-to-point communication standard that allows data transmission between devices over a single pair of wires. However, with the advent of networking technologies like Ethernet, the need to connect RS232 devices to larger networks has arisen.
Ethernet, on the other hand, is the backbone of modern computer networks, providing high-speed, reliable data transmission between devices. Connecting RS232 devices to an Ethernet network allows for seamless integration with other networked systems, enabling remote monitoring, control, and data analysis.
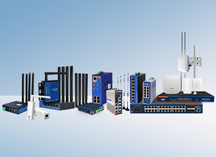
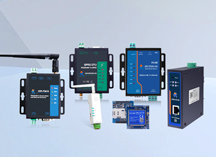
RS232 to Ethernet Converters act as converters, translating data from the RS232 serial interface into Ethernet packets and vice versa. These servers enable RS232 devices to connect to an Ethernet network, allowing them to communicate with other devices and systems seamlessly.
DHCP is a network protocol that enables automatic IP address assignment to devices connected to a network. By configuring an RS232 to Ethernet Converter to use DHCP, you can eliminate the need for manual IP address configuration, simplifying the setup process and reducing the risk of configuration errors.
Here are the steps to configure DHCP for automatic IP address acquisition on an RS232 to Ethernet Converter:
First, you need to access the configuration interface of your RS232 to Ethernet Converter. This can be done through a web-based interface, a serial console, or other methods depending on the specific server model and manufacturer.
Once you have access to the configuration interface, navigate to the network settings section. Here, you will find options related to the server's network configuration.
Locate the DHCP setting in the network configuration section and enable it. This will allow the server to automatically acquire an IP address from a DHCP server on the network.
In addition to enabling DHCP, you may also need to configure other network settings such as the subnet mask, default gateway, and DNS servers. These settings should be provided by your network administrator or can be obtained from your network's DHCP server.
Once you have made the necessary changes, save and apply them to the server. This will activate the DHCP configuration, and the server will now automatically acquire an IP address from the network's DHCP server.
Configuring your RS232 to Ethernet Converter to use DHCP offers several advantages:
· Simplicity: DHCP eliminates the need for manual IP address configuration, reducing the complexity of the setup process.
· Flexibility: DHCP allows for easy IP address management, as addresses can be dynamically assigned and reassigned as needed.
· Scalability: In large networks with multiple devices, DHCP simplifies IP address management by automatically assigning unique addresses to each device.
Configuring an RS232 to Ethernet Converter to automatically acquire an IP address using DHCP is a crucial step in integrating legacy RS232 devices into modern Ethernet networks. By following the steps outlined in this article, you can simplify the setup process, reduce the risk of configuration errors, and ensure seamless communication between your RS232 devices and the rest of your networked systems.