July 31, 2024
Serial to Ethernet Adapter IP address setting method
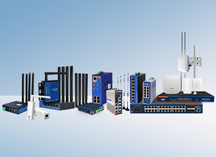
In the field of IIoT, Serial to Ethernet Adapter As a bridge connecting traditional serial devices and networks, R plays a crucial role. It can convert serial port data into network data, enabling remote access and control. Setting the IP address of Serial to Ethernet Adapter correctly is a key step in ensuring smooth and unimpeded connection. This article will detail the method for setting up the IP address of the Serial to Ethernet Adapter, providing professional guidance for those who need to create networking applications.
1. Understanding Serial to Ethernet Adapter
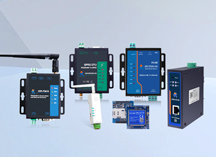
The Serial to Ethernet Adapter, also known as a serial port-to-Ethernet server, is a network device that converts serial signals into Ethernet signals, thereby enabling the connection of serial devices with networks. Through the Serial to Ethernet Adapter, users can remotely access and control serial devices, greatly improving device flexibility and management efficiency.
2. Preparations
Determine the Serial to Ethernet Adapter model and login method
Different Serial to Ethernet Adapter has different setting interfaces and login methods. Typically,Serial to Ethernet Adapterwill provide default user name, password and IP address such as 192.168.1.1 or 192.168.0.1. Users need to find the corresponding user manual or contact the manufacturer for this information based on their Serial to Ethernet Adapter model.
Connect the Serial to Ethernet Adapter
Connect the Serial to Ethernet Adapter with a network cable to your computer or network switch, and ensure that the connection is stable. At the same time, ensure that your computer and Serial to Ethernet Adapter are in the same LAN for subsequent setup.
3. Logging in to the configuration interface
Access the management interface
Open the browser on your computer, enter the default IP address of Serial to Ethernet Adapter and press Enter. This will open the management interface of Serial to Ethernet Adapter. If the Serial to Ethernet Adapter has specific management software, you can also use that software for login.
Log in to the management interface
Input the correct username and password to log in on the management interface. If you have not set a user name and password, you can usually log in using the default user name and password for your device. These default values can be found in the user manual or official website of the device.
4. Set IP address
Find the network settings option
After logging in successfully, find the "Network Settings" or similar options in the management interface. The location of this option may vary depending on the Serial to Ethernet Adapter, but it is usually found in the menu bar or home page.
Select configuration method
The Serial to Ethernet Adapter supports two IP configuration methods: static IP and dynamic DHCP. Static IP: Applicable to environments that require a fixed IP address. Users need to manually enter parameters such as IP address, subnet mask and gateway. Ensure that these parameters match the current network environment without conflicting with other devices in the LAN. Dynamic IP DHCP: Applicable to situations where there is a DHCP server in the network environment that automatically assigns IP addresses. Users only need to enable the DHCP client function,Serial to Ethernet Adapterwill automatically obtain parameters such as IP address, gateway and DNS server addresses from the DHCP server.
Modify IP address
On the network settings page, find the input box for IP address and select a configuration method based on your actual needs. If you choose static IP, manually enter the new IP address, subnet mask, gateway and other information; If you choose dynamic IP, the DHCP client function will be enabled.
Save settings
After completing the modification of IP address, click "Save" or "Apply" button to save new configuration into Serial to Ethernet Adapter. Some Serial to Ethernet Adapter need reboot after changing IP address, so it is recommended to reboot the adapter after saving settings.
5. Verification Settings
Log in to the management interface again
After restarting the Serial to Ethernet Adapter, use the newly set IP address to log in to the management interface again. If you can successfully log in, it means that the IP address is set correctly.
Conduct network testing
Use a computer or other device to connect to the new IP address of the Serial to Ethernet Adapter for network testing. Ensure that the Serial to Ethernet Adapter can connect to the local area network normally and communicate with other devices through the network.
6. Precautions
Before setting the IP address, please ensure that you understand the current network environment and requirements, and choose a suitable IP configuration method.
During the setup process, be sure to follow the user manual or official instructions for the Serial to Ethernet Adapter to avoid operational errors.
Modifying the IP address may cause interruptions in connectivity with other devices, so it is recommended to perform this operation during non-working hours and backup the configuration of the Serial to Ethernet Adapter before making changes.
If you encounter problems during the setup process, you can contact the manufacturer or technical support team of Serial to Ethernet Adapter for assistance. Through the above steps, you can successfully set the IP address of Serial to Ethernet Adapter and achieve stable connection and remote access between serial devices and network. In the application of industrial IoT, this will bring great convenience and efficiency improvement to your equipment management and control.
Industrial loT Gateways Ranked First in China by Online Sales for Seven Consecutive Years **Data from China's Industrial IoT Gateways Market Research in 2023 by Frost & Sullivan
We use cookies to ensure that we give you the best experience on our website. If you continue to use this site we will assume that you are happy with it.